Tuesday, July 9, 2013

Installation of ODI 11g


This post will be helpful in installing Oracle Data Integrator 11g..

Before installing any Oracle Data Integrator (ODI) components, you should read the system requirements and certification documentation to ensure that your environment meets the minimum installation requirements.

Here comes the steps...

Create ODI Schemas with Repository Creation Utility (RCU):

Run the rcu.bat file from rcu/bin folder and Click Next on Welcome screen.


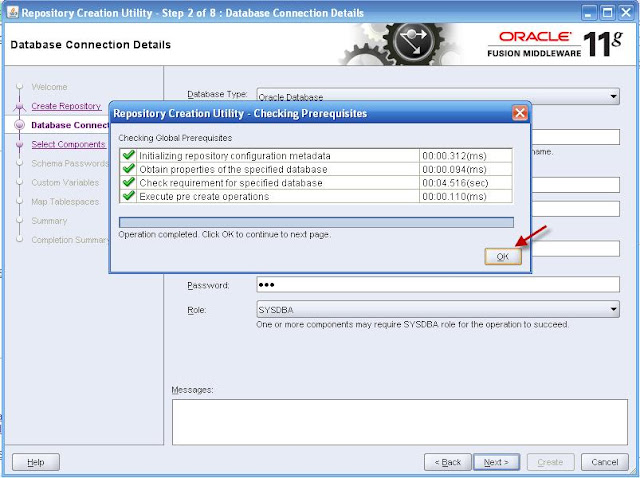
Enter Host, database port, Service Name and the sysdba user details accordingly.


Select Oracle Data Integrator from the components list.


Enter the details in the next step as below:
Master Repository ID: 001
Supervisor Password: <enter password for supervisor user>
Confirm Supervisor Password: <confirm the above password>
Work Repository Type: D
Work Repository ID: 001
Work Repository Name: WORKREP
Work Repository Password: <enter password for work repository>
Confirm Work Repository Password: <confirm the above password>


Install Oracle Data Integrator:

Run setup.exe from Disk1 of the ODI installation dump. Click Next on welcome Screen.


Select Developer Installation components in the below screen. Rest of the components are optional and can be selected as required.


Here, I am not installing a separate weblogic for ODI, instead using the existing weblogic server on which the OBIEE is already installed.

Enter the database connection string and password of ODI Schemas which you have given at the time of running RCU..

Enter the Supervisor password that you have given at the time of RCU installation.


Select WORKREP from dropdown.

Enter Agent Name (should be alphanumeric) and Port number(should be in between 1024 and 65535, and should not be used by any other process).

Click Install to start the installation.

Verify and confirm the installation progress as 100% and all components are successfully installed. 

Click Finish.


Monday, July 8, 2013

Installation and Configuration of BI Apps 11.1.1.7.1


This post will be helpful to do installation and configuration of New Oracle BI Apps 11.1.1.7.1 without any issues.

Key Points to Remember:
  • Recommended OBIEE installation Type is Enterprise.
  •   While Configuring BI Apps, BI Administrator user name should not be “weblogic”, “Administrator” or "Supervisor". Or else it will fail @ Configuring ODI.
  • Upgrade to Oracle weblogic server 10.3.6 is mandatory to enable links and other controls for Configuration Manager and Functional Setup Manager.
  • ODI 11.1.1.7.0 Studio UI does not support JDK 7.
  • Execute configApps.bat only from command Prompt. Or else it implicitly Call Config.bat, which will start OBIEE Configuration.
  • Oracle Database 11.2.0.3 is recommended, available at My Oracle Support.
  • Avoid spaces for any Directory/Folder Paths.
  • All the Fusion Products need to be installed onto same Middleware Home.
  • Only BI Application Administrator Username should be used for ODI, BIACM and Functional Step at login screen to make any changes/modify.
  • OBIEE 11.1.1.7.0 installation of type Software only will cause failures if you apply all the recommended patches.

Installation Steps:

Perform the below procedure in the given order without missing any step.
  • Install JDK 1.6 Update 43.
  • Install 7-Zip Or else Install WinZip with Command Line Add-on. Required to apply patches using Perl script.
  • Run the Fusion Middleware RCU to create BIPLATFORM, MDS, SOAINFRA and ORASDPM Schemas.
  • Install OBIEE 11.1.1.7.0 with Enterprise Install Type.
       
  •  Install ODI 11.1.1.7.0. @ Step 7 of 14 select Skip Repository Configuration.
    
  • Install SOA Suite 11.1.1.7.0 as a Pre-requisite for Oracle Indirect Spend Planning.
  • Copy all dumps (5 files) from <BIApps_RCU_Installer>\rcu\integration\biapps\schema to C:\BIApps_Schemas.

Note: Avoid copying the files to a location with a long directory path.
  • Run BI Apps RCU to create schemas for all the Oracle Application Components:
Ø  Oracle Business Intelligence Applications.
Ø  Oracle Business Analytics Warehouse | DEV_DW
Ø  Oracle Business Intelligence Applications Components | DEV_BIACOMP
Ø  Oracle Data Integration Master and Work Repository | DEV_BIA_ODIREPO
Ø  Oracle Operation Planning
Ø  Oracle Operation Planning | DEV_OPL

At Step 5 of 8, provide the values for all the above components as C:\BIApps_Schemas.
At Step 6 of 8, Alter the Size and Max. Size values for the following 4 tablespaces, leave the remaining attributes to default values. (This can be done by selecting manage tablespace option.

Ø  DEV_DW_DATA Size: 20 GB | Maximum Size: Unlimited
Ø  DEV _DW_IDX Size: GB | Maximum Size: Unlimited
Ø  DEV_DW_STG Size: 10 GB | Maximum Size: Unlimited
Ø  DEV_DW_TEMP Size: 15 GB | Maximum Size: Unlimited

  • Install Oracle BI Apps 11.1.1.7.1 using Generic Installer, will perform Software Only Installation.Installation Location should be Oracle Home for BI. Example: Oracle_BI1.
Applying Patches: (both Generic and Platform Patches)
  • Stop all the BI services, before you apply these patches.
  • Extract the contents of the three downloaded zip files containing the patches into the same directory. The patches contains in folders: biappsshiphomeodisoaweblogic and oracle_common.
  • To apply these patches, edit two files before executing the Perl Script located at path D:\oracle\middleware\Oracle_BI1\biapps\tools\bin.

Ø  Update the parameter input file apply_patches_import.txt as follows according to your system paths:

JAVA_HOME= D:\oracle\middleware\Oracle_BI1\jdk
INVENTORY_LOC=C:\Program Files\Oracle\Inventory
ORACLE_HOME=D:\oracle\middleware\Oracle_BI1
MW_HOME=D:\oracle\middleware
COMMON_ORACLE_HOME=D:\oracle\middleware\oracle_common
WL_HOME=D:\oracle\middleware\wlserver_10.3
SOA_HOME=D:\oracle\middleware\Oracle_SOA1
ODI_HOME=D:\oracle\middleware\Oracle_ODI1
WORKDIR= D:\BIApps_Patches
PATCH_ROOT_DIR= D:\BIApps_Patches
Note: WORKDIR is the directory in which patch logs will be shown and PATCH_ROOT is the directory where all patches are extracted.

Ø  Update the Perl Script APPLY_PATCHES.pl as follows:
    The WinZip Command Line Support Add-On provides a command line interface that allows you to use WinZip directly from the command prompt. Get it from http://www.winzip.com/downcl.htm

      For Winzip:
  For 7-Zip:


      Now execute the command as:

perl D:\oracle\middleware\Oracle_BI1\biapps\tools\bin\APPLY_PATCHES.pl  D:\oracle\middleware\Oracle_BI1\biapps\tools\bin\apply_patches_import.txt


Configure OBIA:
Important note:
1. Run the configApps.bat from command prompt, to include system variable which will Extend BI. (Don’t double-click on configApps.bat batch file)
2. At Step 7, BI Administrator user name should not be “weblogic”, “Administrator” or "Supervisor". Or else it will fail @ Configuring ODI.
  • Before running the configApps.bat process, ensure that Node Manager and All BI Services are up and running.
  • To Configure Oracle BI Applications and Indirect Spend planning. Go to BI_Oracle_Home/bin and run configApps.bat.
  • Enter the correct details accordingly in each step and proceed next screen.
 Upgrade Oracle Weblogic Server to 10.3.6
Download upgrade patch p13529623_1036_Generic.zip from My Oracle Support and unzip and execute it with the following command:
java –D64 –jar –Xmx104m wls1036_upgrade_generic.jar