Thursday, November 18, 2010

Session Variables in OBIEE

Session variables are similar to dynamic repository variables in that they obtain their values from initialization blocks. Unlike dynamic repository variables, however, the initialization of session variables is not scheduled. When a user begins a session, the Oracle BI Server creates new instances of session variables and initializes them.
Session variables are primarily used when authenticating users against external sources such as database tables or LDAP servers. If a user is authenticated successfully, session variables can be used to set filters and permissions for that session.
System Session Variables
System session variables are session variables that the Oracle BI Server and Oracle BI Presentation Services use for specific purposes. System session variables have reserved names, that cannot be used for other kinds of variables.
When you use these variables for Oracle BI Presentation Services, preface their names with NQ_SESSION. For example, to filter a column on the value of the variable LOGLEVEL set the filter to the Variable NQ_SESSION.LOGLEVEL.
The available system session variables are.
DISPLAYNAME:
Used for Oracle BI Presentation Services. It contains the name that will be displayed to the user in the greeting in the Oracle BI Presentation Services user interface. It is also saved as the author field for catalog objects. For internal Oracle BI repository users (nondatabase users), this variable is populated with the user's full name.
EMAIL:
Contains the user's default email address for use with Answers. If the delivery option of Answers is enabled, an email device using this address will be created for the user upon first log in. Users can override this address by changing their account settings in Oracle BI Presentation Services.
GROUP:
Contains the groups to which the user belongs. These are used by both the Oracle BI Server and Oracle BI Presentation Services.When a user belongs to multiple groups, separate the group names with semicolons. Do not delimit text (for example, do not surround the text with single or double quotes). Use a Varchar column in a database table to contain the group memberships.
For example, if a user belonged to groups called Sales US, Sales UK, QA and Dev, and Doc, the text entered into a Varchar data type column in a database table would be:
Sales US;Sales UK;QA and Dev;Doc
Note: The Oracle BI Presentation Services Administrator needs to make sure that the names of Presentation Services groups are different from any user IDs that will be used to log on to Oracle BI Presentation Services. If a user and a Presentation Services group share the same name, the user will receive an Invalid Account message when attempting to log on to Oracle BI Presentation Services.
LAST_SYNCH_TIME and THIS_SYNCH_TIME:
These two variables are set and tracked by Oracle BI Presentation Services to manage the synchronization of Oracle BI Disconnected Analytics. For more information, refer to Oracle Business Intelligence Disconnected Analytics Administration and Configuration Guide.
LOGLEVEL:
The value of LOGLEVEL (a number between 0 and 5) determines the Logging level that the Oracle BI Server will use for user queries.
This system session variable overrides a variable defined in the Users object. If the Administrators Users object has a Logging level defined as 4 and the session variable LOGLEVEL defined in the repository has a value of 0 (zero), the value of 0 applies.
PORTALPATH:
Used for Oracle BI Presentation Services. It identifies the default dashboard the user sees when logging in (the user can override this preference after logged on).
REQUESTKEY:
Used for Oracle BI Presentation Services. Any users with the same nonblank request key will share the same Presentation Server cache entries. This tells Oracle BI Presentation Services that these users have identical content filters and security in the Oracle BI Server. Sharing Presentation Server cache entries is a way to minimize unnecessary communication with the Oracle BI Server.
SKIN:
Determines certain elements of the look and feel of the Oracle BI Presentation Services user interface. The user can alter some elements of the user interface by picking a style when logged on to Oracle BI Presentation Services. The SKIN variable points to an Oracle BI Presentation Services folder that contains the nonalterable elements (for example, graphics such as GIF files). Such directories begin with sk_. For example, if a folder were called sk_companyx, the SKIN variable would be set to companyx.
USER:
Holds the value the user enters as his or her logon name.
WEBGROUPS:
Specifies additional groups specific to Oracle BI Presentation Services, if any. The use of Presentation Services groups provides a mechanism for more granular content control.

Non-system Session Variables


The procedure for defining nonsystem session variables is the same as for system session variables.
A common use for nonsystem session variables is setting user filters. For example, you could define a nonsystem variable called SalesRegion that would be initialized to the name of the user's sales region.
You could then set a security filter for all members of a group that would allow them to view only data pertinent to their region.
When you use these variables for Oracle BI Presentation Services, preface their names with NQ_SESSION. For example, to filter a column on the value of the variable SalesRegion set the filter to the Variable NQ_SESSION.SalesRegion.
Step by step process of creating session variables..
     1.  From the Administration Tool menu bar, choose Manage > Variables.

    2.  In the Variable Manager dialog box, from the menu bar, choose Action>New>Session>Variable.

  1. In the Session Variable dialog box, type a variable name.
    Names for all variables should be unique. The names of system session variables are reserved and cannot be used for other types of variables.

     For session variables, you can select the following check boxes:
  1. --Enable any user to set the value:
    Check box that allows you to set the session variables after the initialization block has populated the value (at user login) by calling the ODBC store procedure NQSSetSessionValue(). For example, this allows non-Oracle BI Administrators to set this variable for sampling.
    --Security Sensitive:
    Check box that identifies the variable as sensitive to security for virtual physical databases (VPD). When filtering cache table matches, the Oracle BI Server looks at the parent database of each column or table that is referenced in the logical request projection list. If the physical database source is a VPD, the Oracle BI Server matches a list of security-sensitive variables to each prospective cache hit. Cache hits would only occur on cache entries that included and matched all security-sensitive variables.
  2. Use the Initialization Block drop-down list to select an initialization block that will be used to refresh the value on a continuing basis.

    To create a new initialization block, click New.
  3. To add a Default initializer value, perform one of the following steps:
    • To use the Expression Builder, click the ellipsis button to the right of the Default initializer work space.
    • Type the value into the Default initializer text box.
  4. Click OK.   

Repository Variables in OBIEE

A repository Variable has a single value at any point of time. There are two types of Repository variables. Static and Dynamic.

          Repository variables can be used instead of literals or constants in expression builders in the Administration Tool. The Oracle BI Server will substitute the value of the repository variable for the variable itself in the metadata.
Static Repository Variables:
The value of a static repository value is initialized in the Variable dialog box. This value persists, and does not change until an Oracle BI Administrator decides to change it.
Example
Suppose you want to create an expression to group times of day into different day segments. If Prime Time were one of those segments and corresponded to the hours between 5:00 PM and 10:00 PM, you could create a CASE statement like the following:
CASE WHEN "Hour" >= 17 AND "Hour" < 23 THEN 'Prime Time' WHEN... ELSE...END
where Hour is a logical column, perhaps mapped to a timestamp physical column using the date-and-time Hour(<<timeExpr>>) function.
Rather than entering the numbers 17 and 23 into this expression as constants, you could use the Variable tab of the Variable dialog box to set up a static repository variable named prime_begin and initialize it to a value of 17, and create another variable named prime_end and initialize it to a value of 23.
After created, variables are available for use in expression builders. In an expression builder, click on the Repository Variables folder in the left pane to display all repository variables (both static and dynamic) in the middle pane by name.
Variables should be used as arguments of the function VALUEOF( ).
For example, the following CASE statement is identical to the one explained in the preceding example except that variables have been substituted for the constants.
CASE WHEN "Hour" >= VALUEOF("prime_begin")AND "Hour" < ALUEOF("prime_end") THEN 'Prime Time' WHEN ... ELSE...END.

Dynamic Repository Variables

You initialize dynamic repository variables in the same way as static variables, but the values are refreshed by data returned from queries. When defining a dynamic repository variable, you will create an initialization block or use a pre-existing one that contains a SQL query. You will also set up a schedule that the Oracle BI Server will follow to execute the query and periodically refresh the value of the variable.


Example


Dynamic repository variables are very useful for defining the content of logical table sources. For example, suppose you have two sources for information about orders. One source contains recent orders and the other source contains historical data.

You need to describe the content of these sources on the Content tab of the Logical Table Source dialog box. Without using dynamic repository variables, you would describe the content of the source containing recent data with an expression such as:
Orders.OrderDates."Order Date" >= TIMESTAMP '2001-06-02 00:00:00'

This content statement will become invalid as new data is added to the recent source and older data is moved to the historical source. To accurately reflect the new content of the recent source, you would have to modify the fragmentation content description manually. Dynamic repository values can be set up to do it automatically.

Another suggested use for dynamic repository values is in WHERE clause filters of logical table sources, that are defined on the Content tab of the Logical Table Source dialog box.
The values of dynamic repository variables are set by queries defined in Variable Initialization blocks.

A common use of these variables is to set filters for use in Oracle BI Presentation Services. For example, to filter a column on the value of the dynamic repository variable CurrentMonth, set the filter to the Variable CurrentMonth.

Step by step process of creating repository variable
   1.  From the Administration Tool menu bar, choose Manage > Variables.

Now the variable manager dialogue box appers...
  1. In the Variable Manager dialog box, from the menu bar, choose Action>New>Repository>Variable.

Repository variable dialogue box is as follows...
  1. In the Variable dialog box, type a Variable name.
    Names for all variables should be unique. The names of system session variables are reserved and cannot be used for other types of variables.

In the Variables dialog box, select the type of variable: Static or Dynamic.
  1. The name of the dialog box changes to reflect the type of variable that you select.
  2. (Dynamic repository variables) Use the Initialization Block drop-down list to select an existing initialization block that will be used to refresh the value on a continuing basis.
    To create a new initialization block, click New.

    6.   (Dynamic or static variables) To add a Default initializer value, perform one of the following steps:
  •  To use the Expression Builder, click the ellipsis button to the right of the Default initializer work space.
  • Type the value into the Default initializer text box.For static repository variables, the value you specify in the Default initializer window persists. It will not change unless you change it. If you initialize a variable using a character string, enclose the string in single quotes ( ' ).

  1. Click OK.

Wednesday, November 17, 2010

Installation process of OBIEE

We require the following:
  • Java jdk-1_5_0_06-windows-i586-p.exe
  • OBIEE OBIEE 10.1.3.3
We need to do the following:
  1. Copy installation files into your local machine
  2. Install JAVA/JDK
  3. Set JAVA_HOME, PATH, CLASSPATH
  4. Install OBIEE
  5. Explore OBIEE physical folders
  6. Explore OBIEE installed components
  7. Create some sample reports and charts
Installation:


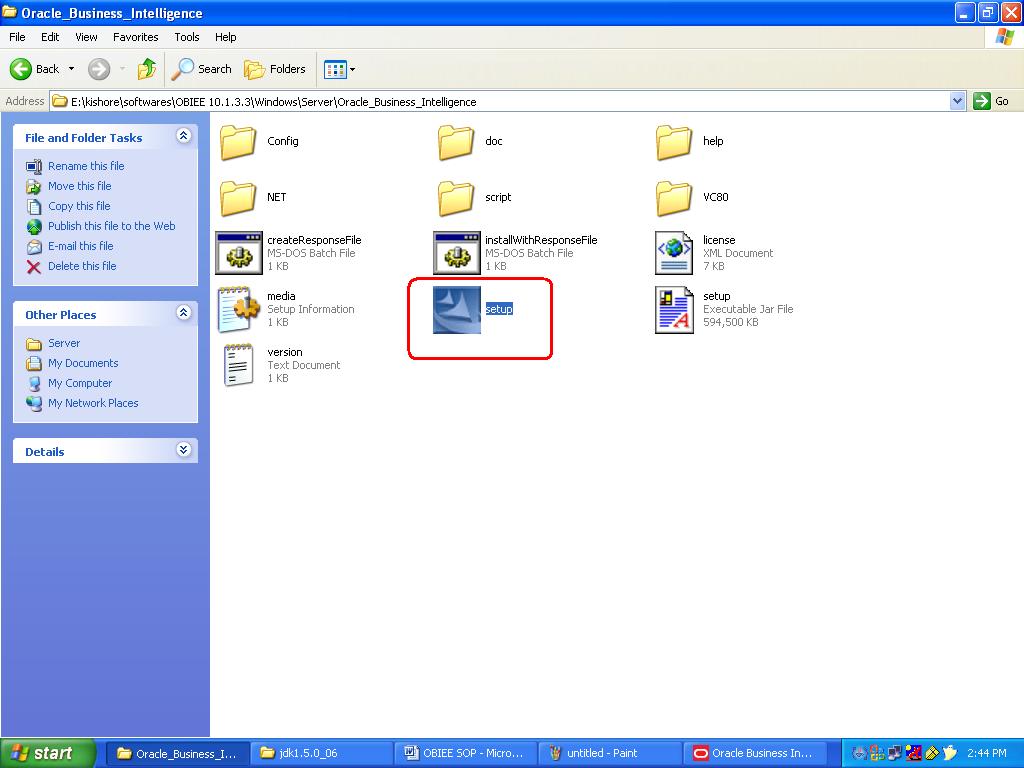
After completing the installation process, we can find the following components.. 


Tuesday, November 16, 2010

iBots in OBIEE

“Unofficial” abbreviation for iBOT is Intelligent Bursting and Output Tool.

                “ iBot is an utility available in Siebel Analytics which is used for reports scheduling as well as Alerts sent to the required recipients on different web accessible / communication devices.”

Creating iBOTS

We can create iBOTS in Oracle BI Presentation Services.
More products->Delivers 

The following page appears and choose Create New iBot link...


Then it will navigate us to the following page and we'll discuss about each and tab individually...

Overview:
This page used to view a summary of the current settings for the selected iBot.
One can navigate to specific settings by clicking on the links in the summary or clicking on the tabs located at the top.

General:.
This is the place where we can specify the priority of the iBot and how to send the delivery content.
1) You can set the priority to low, normal, or high. The priority works with the delivery profile for a user to determine the destination for alerts of different priorities.
2)Select the data visibility from the Data Visibility drop-down list.
    In this we have three options.
   Personalized (individual data visibility):
This option uses the data visibility of each recipient to customize iBot delivery content for each recipient. 
This setting does not use the Run As field.
  Not personalized (use the Run As user's data visibility):
   This option sends the iBot's delivery content to the specified recipients. All users receive the same content as if they were the user specified in the Run As field.This option is available only to users defined as Oracle BI Web administrators with at least one of the following privileges set in Oracle BI Web Administration: 
--Publish iBots for subscription.
--Deliver iBots to specific or dynamically determined users.
 Not personalized (use iBot owner's data visibility)
           This option sends the iBot's delivery content to the specified recipients using the data visibility of the user who created the iBot. All users receive the same content as if they were the iBot owner.This option is available to users that have at least one of the privileges listed previously, but does not require you to be defined as a Oracle BI Web administrator.

Conditional Request:

Conditional Request tab is uded to select a request to trigger the iBot. You can further refine the request by re-opening it in Oracle BI Answers and using subqueries.
The results of the request determine whether the iBot sends its delivery content and initiates any subsequent actions:
  • If the request does not return any rows, the iBot is not triggered.
  • If the request returns at least one row, the iBot sends its delivery content and initiates any subsequent actions. 
Requests can be chained together to create complex conditional logic.

Schedule:

Schedule tab is used to determine when the iBot runs, how often it runs, and when to discontinue running it.
iBots can execute based on a specified schedule. You can define a starting date and time for the iBot, a recurrence schedule, and an ending date.
To create an iBot with no schedule:
  • Click the Set schedule option to remove the check mark.
To start the iBot now:
  1. Click the Set schedule option to show the check mark.
  2. Click the Start Immediately radio button.
  3. Click the Save this iBot button.
To start the iBot at a specified date and time:

     1.   Enter the date in the Start Date box (or click the calendar icon to select a date).
     2.   (Optional) Enter a starting time.
     3.   (Optional) Select the time zone to determine when the iBot starts. 

To execute the iBot one time only:
  • Click the Once option Run once (or on one day if repeating).
    If the iBot has already run, this option enables you to specify that the iBot will only run once more on the specified time or day.
To execute the iBot on a daily schedule:
  • Click the Daily option and specify the daily interval, such as every 2 days.
To execute the iBot on a weekly schedule:
  1. Click the Weekly option and specify the weekly interval, such as every 1 week.
  2. Select the days of the week when the iBot should run, such as Monday through Friday.
To execute the iBot on a monthly schedule:
  1. Click the Monthly option and specify either the day of the month or the day occurrence, such as the first Tuesday.
  2. Select the desired months. 
To execute the iBot multiple times within a day:
  1. Click the Repeat every check box.
  2. Enter the interval between executions (in minutes), and the time to stop the repetition.
  3. In the Recurrence section, click the Daily radio button, and specify Every 1 day(s). 
To select an ending date
  • Click the End by option and enter a date, or select a date from the calendar. 
Recipients:
Recipients tab is used to select the users and groups to receive the delivery content of the iBot.
To send the delivery content to the creator of the iBot:
  • Click the Me option.
To send the delivery content to multiple users:
  1. Click the A specific list of recipients option.
  2. Click the Choose recipients button to open the Select Recipients dialog box and specify the eligible users and groups.
To allow users to subscribe to the iBot:
  1. Click the following option:
    Publish for subscription.
    When you select the Publish for subscription option, the Allow subscribers to customize iBot option is enabled.This option allow subscribers to customize iBot and also enables subscribers to supply filter values for prompted filters for columns in an iBot.
  2. Click the Select button to open the Select Subscribers dialog box and specify the eligible users and groups.
  3. Click the Save this iBot button to save this shared iBot.
To allow the recipients to be determined dynamically from the results of a conditional request:
  1. Click the following option:
    Determine recipients from conditional request
  2. To identify the column that contains the desired recipients, make a selection from the Column Containing Recipients drop-down list.
    You can also specify a second column from the request.
  3. To send a subset of the data in the delivery content, click the following option:
    Show relevant rows only.
    For example, if a request runs, and only a subset of rows in the result pertains to a single user, only those rows are delivered.
NOTE:  You must be an Oracle BI administrator to see this option.

To disallow users from subscribing to the iBot:
  • Click the following option to remove the check mark:
    Publish for subscription.
To unsubscribe users to the iBot:
  1. Click the Modify button in the Current Subscribers area.
  2. Select the users to unsubscribe, click the delete button, and then click OK. 
Delivery Content:
Delivery Content tab is used to specify the type of content to deliver with the iBot, such as a dashboard page or a saved request. You can also specify the delivery format for the content, such as HTML, PDF, XLS, CSV, or text.
To add a headline to appear as the iBot subject line:
  • Type a short, descriptive headline into the Headline text box.
To select the delivery content for the iBot:
  1. Click the Select Content button.
  2. At the Choose Delivery Content dialog box, select the delivery content and click OK.
  3. Choose a format for the delivery content from the Send content as drop-down list.
If we want to add a text message to provide the context for the ibot attachment 
we can choose the option If sent as attachment, include this text.

To remove the delivery content for the iBot:
  • Click the Clear Content button.
To specify a text message to deliver to recipients when there is no iBot 
content to deliver to them:
  1. Click the following option:
    Deliver this message when no records are returned
  2. Type the text into the text box.
We can add variables in any one of the text areas provided above.
 the syntax is shown in the following table:

Variable Type
Syntax
Repository
@{Variable_Name}
Session
@{NQ_SESSION.Variable_Name}
Presentation
@{Variable_Name}
Destinations:


Destinations tab is used to specify a range of desired devices and 
destinations for iBots.

To select the user Destinations:
  • User destinations can be the Interactive Dashboards or the Active Delivery
profile of specific users who have configured Oracle Delivers.

To select the specific Devices:
  • We can choose the devices using the check boxes provided.
To select the system services:


This section describes the system services available for administrators on the 
Destinations page.
1)Oracle BI Server Cache:
This is used for seeding cache.
(choose the Personalized option for data visibility at the General tab).
2)Disconnected Application Cache
This setting is for organizations that have licensed Disconnected Analytics 
or a disconnected application such as Oracle's Siebel Pharma Mobile Analytics. .
(Nonpersonalized data is not used for Disconnected Analytics users.)

Advanced:


Advanced tab is used to specify one or more actions to execute when the iBot 
completes. Actions will be executed on behalf of each user who is a recipient 
of the iBot. You can change the default  behavior for each iBot action. Actions 
include the execution of other iBots, custom  scripts, custom Java programs or
Workflows defined using the Oracle's Siebel Workflow Version 7.7 (or higher)
application. You can also specify actions to execute either when iBot conditions 
are satisfied, or when no records are returned.

We can choose these actions when iBot conditions are satisfied and also when 
iBot conditions are not satisfied.

Monday, November 15, 2010

Step by step process for Creating Prompts in OBIEE

To simplify filtering, Oracle BI Answers provides two types of prompts:

1.Dashboard Prompts
2.Criteria Prompts

Dashboard Prompts:
A dashboard prompt is a special kind of filter that filters requests embedded in a dashboard. A dashboard prompt filters embedded requests that contain the same columns as the filter. It can filter all embedded requests in a dashboard, or embedded requests on the same dashboard page.
Multiple columns in a dashboard prompt can be used to constrain users' choices for subsequent selections. For example, if one column filters on a region, and the next column filters on districts, the district column can be constrained to show only districts in the region the user selects. A dashboard prompt can also be populated dynamically so that it can be programmatically customized for each user.

To create a Dashboard prompt, Go to answers tab, you can see the following icons in the left top corner..

Now select the below icon to create a new Dashboard Prompt...

Now you will get into the below screen..
Here we can select the scope of the prompt.
If the scope is Dashboard the prompt will affect the whole Dashboard.
If the scope is Page the prompt will affect only that particular page.

After that you need to choose the column(from the required subject area) on which we are going to create the prompt. For example it looks as follows:
  1. Column : the specific column we have choosen for prompt.
  2. Operator: We can choose any one of the existing operations.
     3.  Control: We can choose how the prompt should appear.
 
     4.  Show: What values must be shown in prompt list. We can use SQL queries also to  display the list.

      5.  Default Value: What can be the Default Value.

      6.  Set Variable: Here We can Set the variable to two types. Presentation Variable and Request Variable. Other wise we can set it to None if no variable required.

Presentation Variables:
The Presentation Variable is the only variable offered by the Presentation service. It will take the datatype of the presentation column on which the prompt is created.

Syntax: @{variables.<variableName>}{<default>}[format]

variables: Optional
variableName: It refers to the variable which should be different from the existed variable names.
Default: The default value of the variable.
Format: It represents the format in which the variable values need to be displayed.

Request Variables:
A common way to set up a Request variable in order to set a session varibale is to create a prompt.

There are two type of session variables
1.System session Variables: System session variables are session variables that the Oracle BI Server and Oracle BI Presentation Services use for specific purposes. System session variables have reserved names, that cannot be used for other kinds of variables.
2.Non System session Variables:A common use for nonsystem session variables is setting user filters.
When you use these variables for Oracle BI Presentation Services, preface their names with NQ_SESSION. For example, to filter a column on the value of the variable LOGLEVEL set the filter to the Variable NQ_SESSION.LOGLEVEL.
We can create session variables from Administration tool menu bar...
Goto Manage->variables
Variable Manager window opens then goto Action->New->session->Variable
         The main difference between Presentation variables and Request variables is request variable once created cannot be changed, it remains same for all the users. But the presentation variable can change for different users.
     7)   Label: It represents the display name of the prompt.


Criteria Prompts:
A criteria prompt guides users in making selections for individual requests. There are two kinds of criteria prompts,
  1. Column Filter Prompts
  2. Image Prompts

    Column Filter Prompts: A column filter prompt provides general filtering of a column within a request. A column filter prompt can present all choices for a column, or, like a dashboard prompt, it can present constrained choices for a column. For example, if a request contains a Region=East filter, constraining choices for the City column restricts the selections to cities in the East region only. This eliminates the selection of a mutually exclusive filter that could result in no data.
Creating Column Prompt....

click the Prompts tab ->Create Prompt ->Column Filter Prompt.

Now you can see the window as shown below.

You should enter the details as follows...

1)Type a caption for the column filter prompt in the Caption box. The caption will appear to the user.

2)Type a description in the Description box. Descriptions are displayed when Oracle BI administrators use the Catalog Manager.

3)From the Filter on Column drop-down list, select the column in the request that you want to filter,and then, from the Operator drop-down list, select the operator to use.

4)Specify how the user should choose values by clicking the appropriate option. Users can select values from a drop-down list, or browse through choices and type them into a text box.

5)”What values should be shown to the user” helps you choose different ways of displaying the choices.

6)”Other Options” are used for choosing other specific choices we need on the prompt.

To modify the properties of a column filter prompt in Oracle BI Answers..
  1. Click the Properties link to open the Column Filter Prompt Properties dialog box.
  1. Make your changes, and then click OK.
To delete a column filter prompt in Oracle BI Answers..
Click the Delete link.


 Image Prompts: An image prompt provides an image that users click to select their request criteria. For example, from an image that shows products, users can click a product. The selected product is then used to filter the underlying request. To create an image prompt, you need to know how to use the HTML <map> tag to create an image map definition.

Image prompts appear on the Prompts tab in Oracle BI Answers. When you have multiple image prompts constructed for a request, they are executed in the order they are listed, from top to bottom.

Creating Image Prompt..

Click the Prompts tab ->Create Prompt -> Image Prompt.

Now you can see the screen as follows..

We need to enter the details as follows..

1)Type a caption for the image prompt in the Caption box. The caption will appear to the user. You can include HTML markup tags in the caption, such as <b>, <font>, and <table>.

2)Type a description in the Description box.Descriptions are displayed when Oracle BI administrators use the Catalog Manager.

3)Type the location and name of the image in the Image URL box.

4)Type the appropriate HTML <map> tags and data in the HTML box.

5)To extract the image map information from the HTML, click the link Extract Image Map from HTML. The Image Map Prompt Properties dialog box expands to show the area titles, shapes, and coordinates entered in the HTML box.
  • For each area, in the Column box, type the name of the column to pass when a user clicks it, and the value to use.
NOTE:The column needs to be a fully qualified column name, in the format Table.Column Name.
  • Place double quotes around any column names containing spaces. These are examples:
    • "Country name"
    • "Units shipped"
6)When you are finished, click OK.

To modify the properties of an image prompt in Oracle BI Answers
Click the Properties link to open the Image Map Prompt Properties dialog box.

To delete an image prompt in Oracle BI Answers
Click the Delete link.